How to Prepare a Home for a Real Estate Photography Session
In today’s digital real estate market, first impressions are almost always made online. Before scheduling a showing, potential buyers browse listing photos to determine whether a property is worth their attention. That is why proper preparation before a real estate photography session can significantly impact buyer interest, showings, and ultimately the speed of a sale.
Whether you’re a real estate agent, broker, homeowner, or property manager, preparing a property before the photographer arrives helps ensure the final images showcase the home at its absolute best. Small details can make a major difference in how buyers perceive a property online.
Why Proper Preparation Improves Real Estate Photography Results
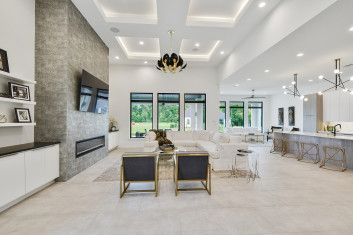
Professional listing photos help properties stand out on real estate portals, social media platforms, and marketing materials. However, even the most experienced photographer relies on a well-prepared property to create exceptional images.
When a home is clean, organized, and visually appealing, buyers can focus on the property’s features rather than distractions. Proper preparation can help:
- Make rooms appear larger and more inviting.
- Highlight the property’s best features.
- Create a positive emotional connection with buyers.
- Increase engagement with online listings.
- Encourage more property showings.
Many successful agents invest in professional real estate photography because high-quality images are often the deciding factor that motivates buyers to learn more about a property.
For additional preparation strategies, agents and sellers can also review Pro Tips for Preparing Your Listing Photos, which provides valuable insights for maximizing listing appeal.
How to Declutter and Stage Every Room Effectively
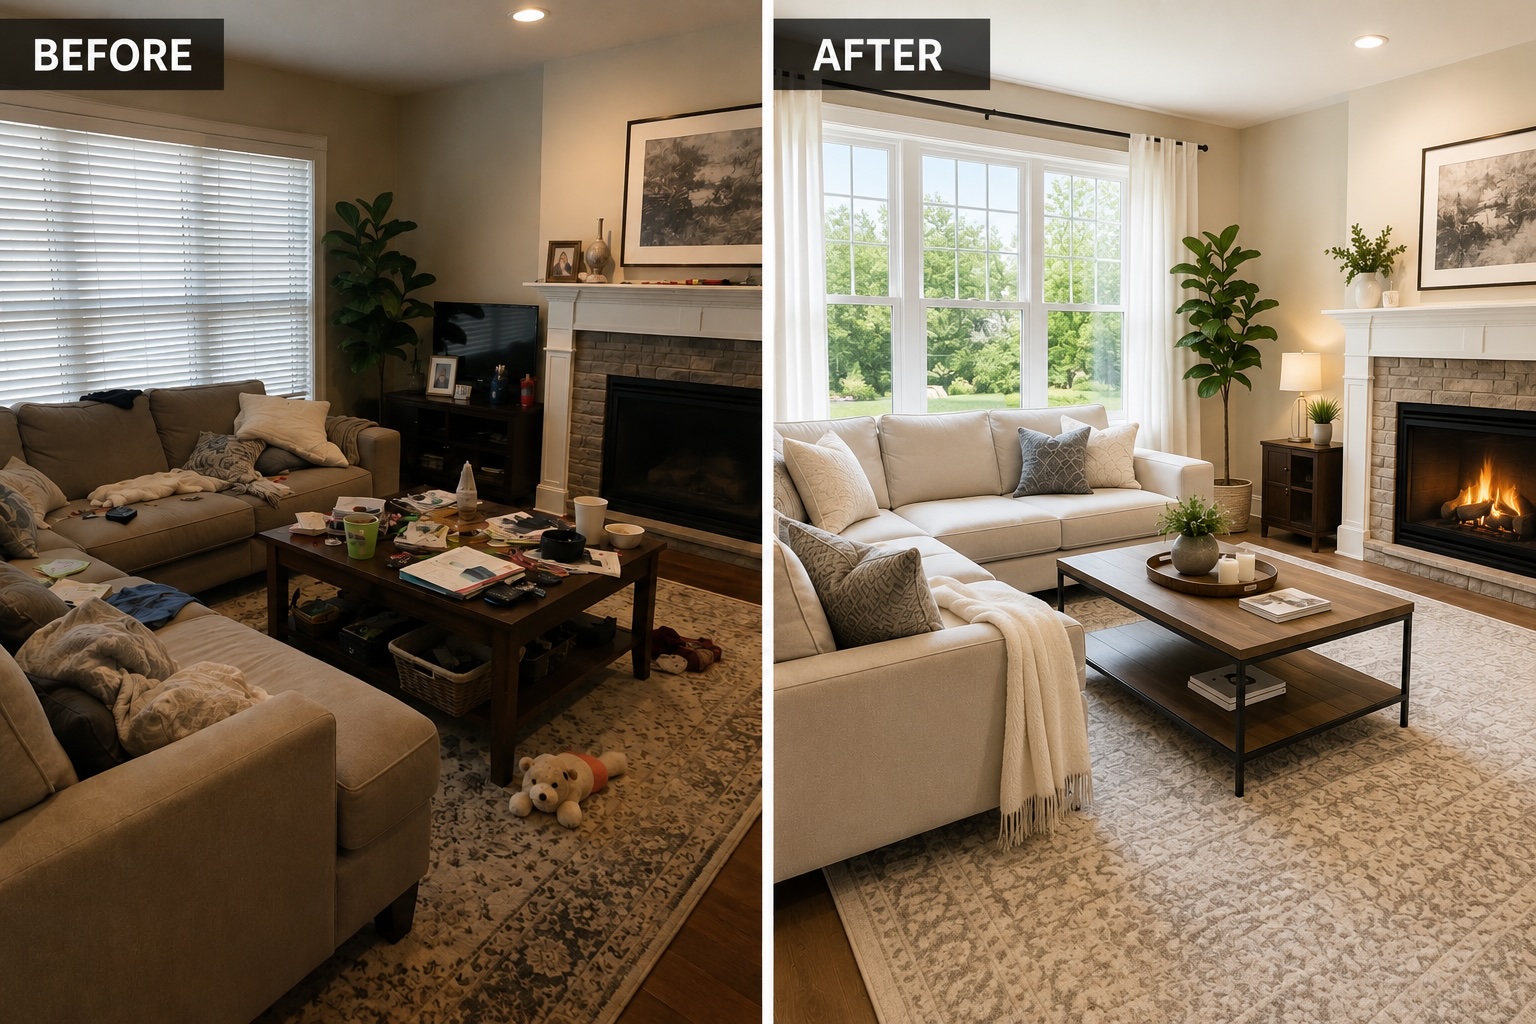
One of the most important steps before a photography session is removing unnecessary items that create visual clutter.
Buyers want to focus on the space itself rather than the belongings inside it. A cluttered room can feel smaller, darker, and less appealing in photographs.
Before the session, consider:
- Removing personal photographs.
- Clearing kitchen countertops.
- Organizing bookshelves and open storage areas.
- Hiding charging cables and electronics.
- Removing excess furniture when appropriate.
- Storing children’s toys and pet accessories.
The goal is not to make the home look empty. Instead, it should feel clean, spacious, and welcoming.
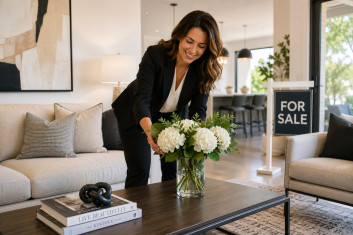
Proper staging helps buyers imagine themselves living in the property. Even simple adjustments can dramatically improve the final images and the overall effectiveness of the listing.
Sellers may also benefit from reading Expert Real Estate Photography Tips for Home Sellers which covers additional techniques for presenting a property effectively.
Cleaning Tasks That Make a Big Difference in Listing Photos
Professional cameras capture details that are often overlooked during everyday living. Dust, fingerprints, smudges, and stains may become highly visible in high-resolution photographs.
Before the photographer arrives, focus on cleaning the following areas:
- Windows and glass doors.
- Mirrors throughout the home.
- Stainless steel appliances.
- Bathroom fixtures and shower doors.
- Hardwood floors and tile surfaces.
- Kitchen countertops and backsplashes.
Pay special attention to reflective surfaces because they tend to stand out in photographs.
Exterior presentation is equally important. Buyers frequently form their first impression from the property’s exterior photos. Mow the lawn, remove debris, tidy landscaping, and ensure the front entrance looks welcoming.
In competitive real estate markets such as Chicago real estate photography, well-prepared properties often attract more attention because buyers have numerous listings to compare.
Using Natural Light to Enhance Real Estate Photography
Lighting plays a crucial role in creating attractive real estate images.
Natural light helps rooms appear brighter, larger, and more inviting. Proper lighting can dramatically improve the mood and overall quality of listing photos.
Before the session:
- Open all curtains and blinds.
- Clean windows to maximize incoming light.
- Replace burned-out light bulbs.
- Use matching bulb temperatures whenever possible.
- Turn on interior lights when instructed by the photographer.
The timing of the session also matters. Professional photographers often schedule shoots based on the property’s orientation and the position of the sun throughout the day.
A well-lit property feels more welcoming and allows buyers to better appreciate the home’s features.
Understanding lighting is one of the key factors discussed in many real estate marketing resources, including How Professional Photography Helps Sell Homes Faster.
Common Mistakes That Can Hurt Your Property Photos
Even properties with great potential can suffer from poor presentation. Avoiding common mistakes helps maximize the value of a professional photography session.
Leaving Personal Items Visible
Family photos, personal documents, and highly individualized décor can distract buyers and make it harder for them to envision themselves in the home.
Ignoring Minor Repairs
Small issues such as chipped paint, burned-out bulbs, loose cabinet handles, or damaged fixtures may seem insignificant but can become noticeable in professional images.
Forgetting Outdoor Areas
Patios, balconies, gardens, and entryways are important selling features. Neglecting these spaces can reduce the overall appeal of the listing.
Overcrowding Rooms
Too much furniture or décor can make spaces feel cramped. Removing a few items often improves room flow and visual balance.
Addressing these issues before the photographer arrives can significantly improve the final results.
What to Expect on the Day of the Photography Session
Once the home is fully prepared, the photography session itself is usually straightforward and efficient.
The duration depends on the size of the property, the number of rooms, and any additional services such as drone photography, floor plans, or virtual tours.
To help the session run smoothly:
- Ensure all preparation is completed beforehand.
- Keep countertops and surfaces clear.
- Move vehicles away from prominent exterior views if possible.
- Keep pets out of photographed areas.
- Allow the photographer to work without interruptions.
Professional companies such as Fotosold follow standardized processes designed to capture consistent, high-quality images that support successful real estate marketing campaigns.
The more preparation completed before the session, the more time the photographer can dedicate to capturing the property’s best angles and features.
Conclusion
Preparing a property for a real estate photography session is one of the most effective ways to improve the quality of listing images and attract more buyer attention. From decluttering and deep cleaning to optimizing lighting and addressing small maintenance issues, every step contributes to a stronger visual presentation.
For real estate agents, brokers, homeowners, and property managers, investing time in preparation can lead to better listing performance, increased buyer interest, and a more efficient sales process. When combined with professional real estate photography, a well-prepared property has a much greater opportunity to make a lasting impression on potential buyers.